
Top 5 Azure App Configuration Features!
Hey folks. Even though App Configuration is still in preview mode, I completely agree he is a bit of a hidden gem. So by the end of this post, I’d like you to know his top 5 most impressive features. Let’s get started.
Hierarchical namespaces
So number 5 is hierarchical namespaces.
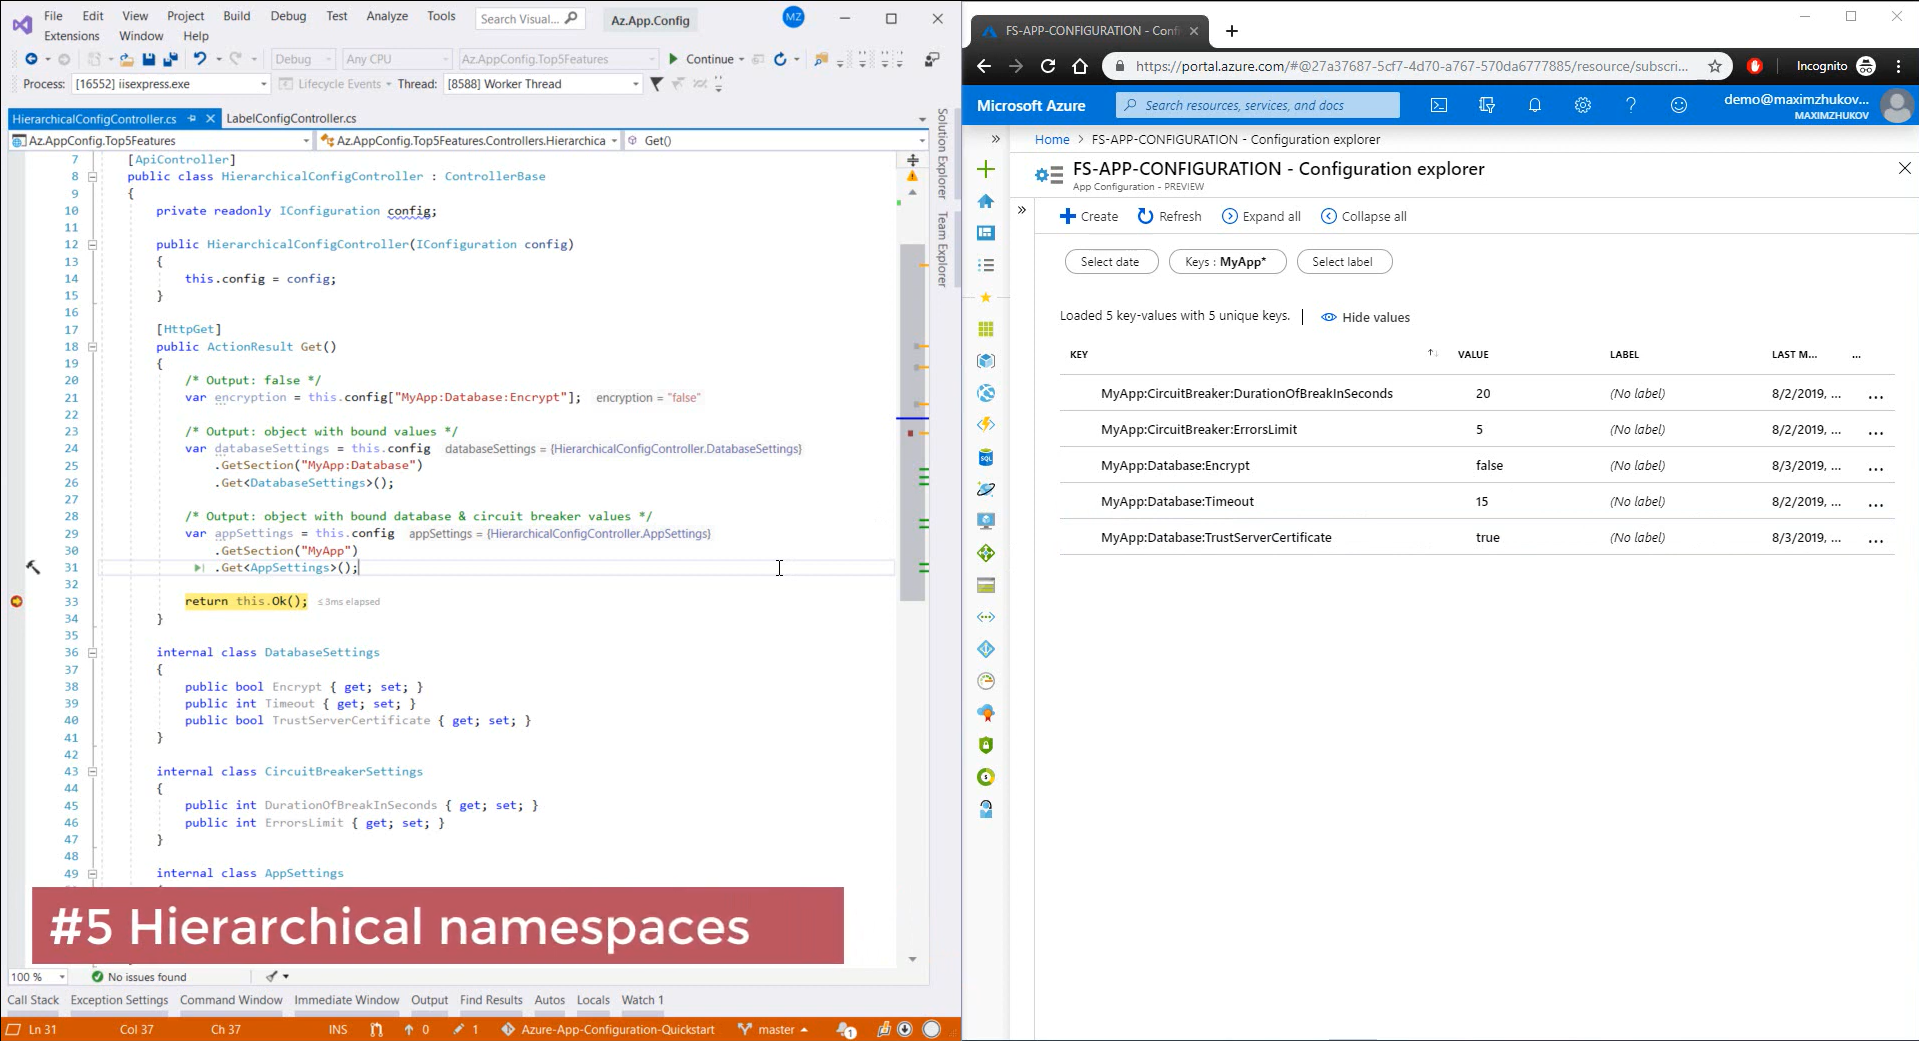
To do not have a mess, we need to group our configuration values. So, on the right side you can see the keys, that are structured into the hierarchy. At the same time in the code we can:
- Get a value by a key:
private readonly IConfiguration config;

public HierarchicalConfigController(IConfiguration config)
{
    this.config = config;
}

[HttpGet]
public ActionResult Get()
{
    /* Output: false */
    var encryption = this.config["MyApp:Database:Encrypt"];

    return this.Ok();
}
- Bind a set of values to a specific object:
[HttpGet]
public ActionResult Get()
{
    /* Output: object with bound values */
    var databaseSettings = this.config
        .GetSection("MyApp:Database")
        .Get<DatabaseSettings>();

    return this.Ok();
}
- Or even bind the entire hierarchy:
[HttpGet]
public ActionResult Get()
{
    /* Output: object with bound database & circuit breaker values */
    var appSettings = this.config
        .GetSection("MyApp")
        .Get<AppSettings>();

    return this.Ok();
}
Looks extremely convenient, isn’t it?
Label keys
And the feature number 4 is keys labeling.
What if we wanna have different configuration values for a production instance of our application. For example, we’d like to turn on encryption of our database connection. Actually, it’s not a big deal:
- We’re just adding a new value with the label
Production:
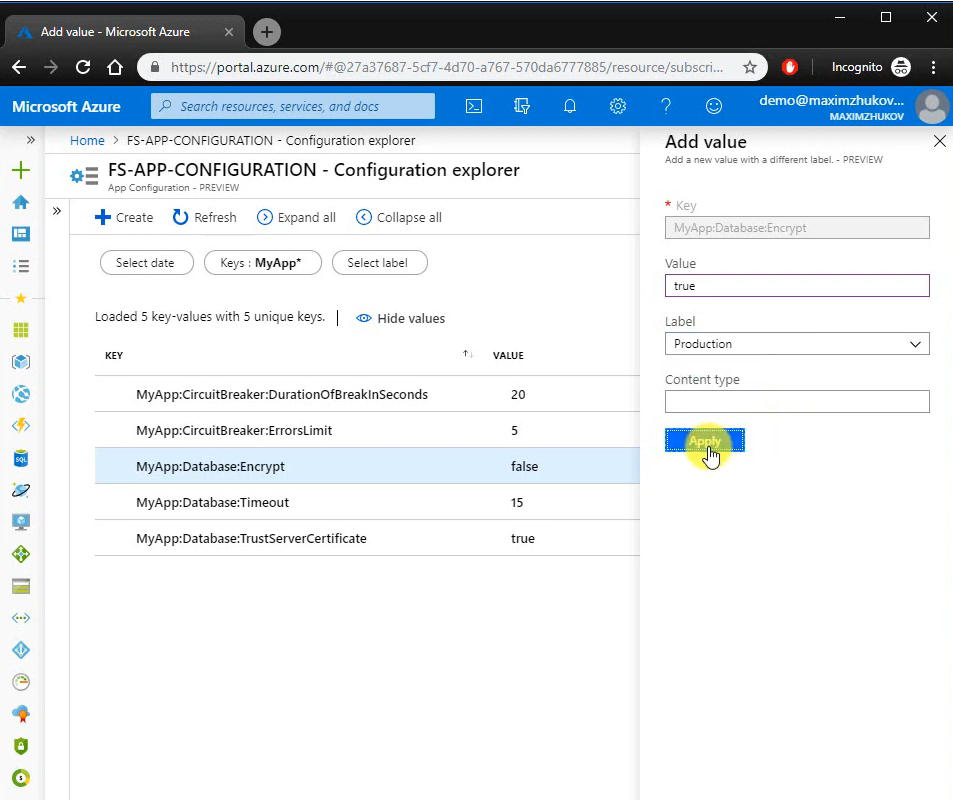
- And include such key-values in the configuration provider:
public static IWebHostBuilder CreateWebHostBuilder(string[] args) =>
    WebHost.CreateDefaultBuilder(args)
    .ConfigureAppConfiguration((hostingContext, config) =>
    {
        var settings = config.Build();

        config.AddAzureAppConfiguration(options =>
        {
            options.ConnectionString = settings["ConnectionStrings:AppConfiguration"];
            options.Use("*");

            // Include the key values with the label 'Production'
            options.Use("*", "Production");
        });
    })
    .UseStartup<Startup>();
And that’s it.
If we start our application, we’ll see, that encryption value now equals to true.
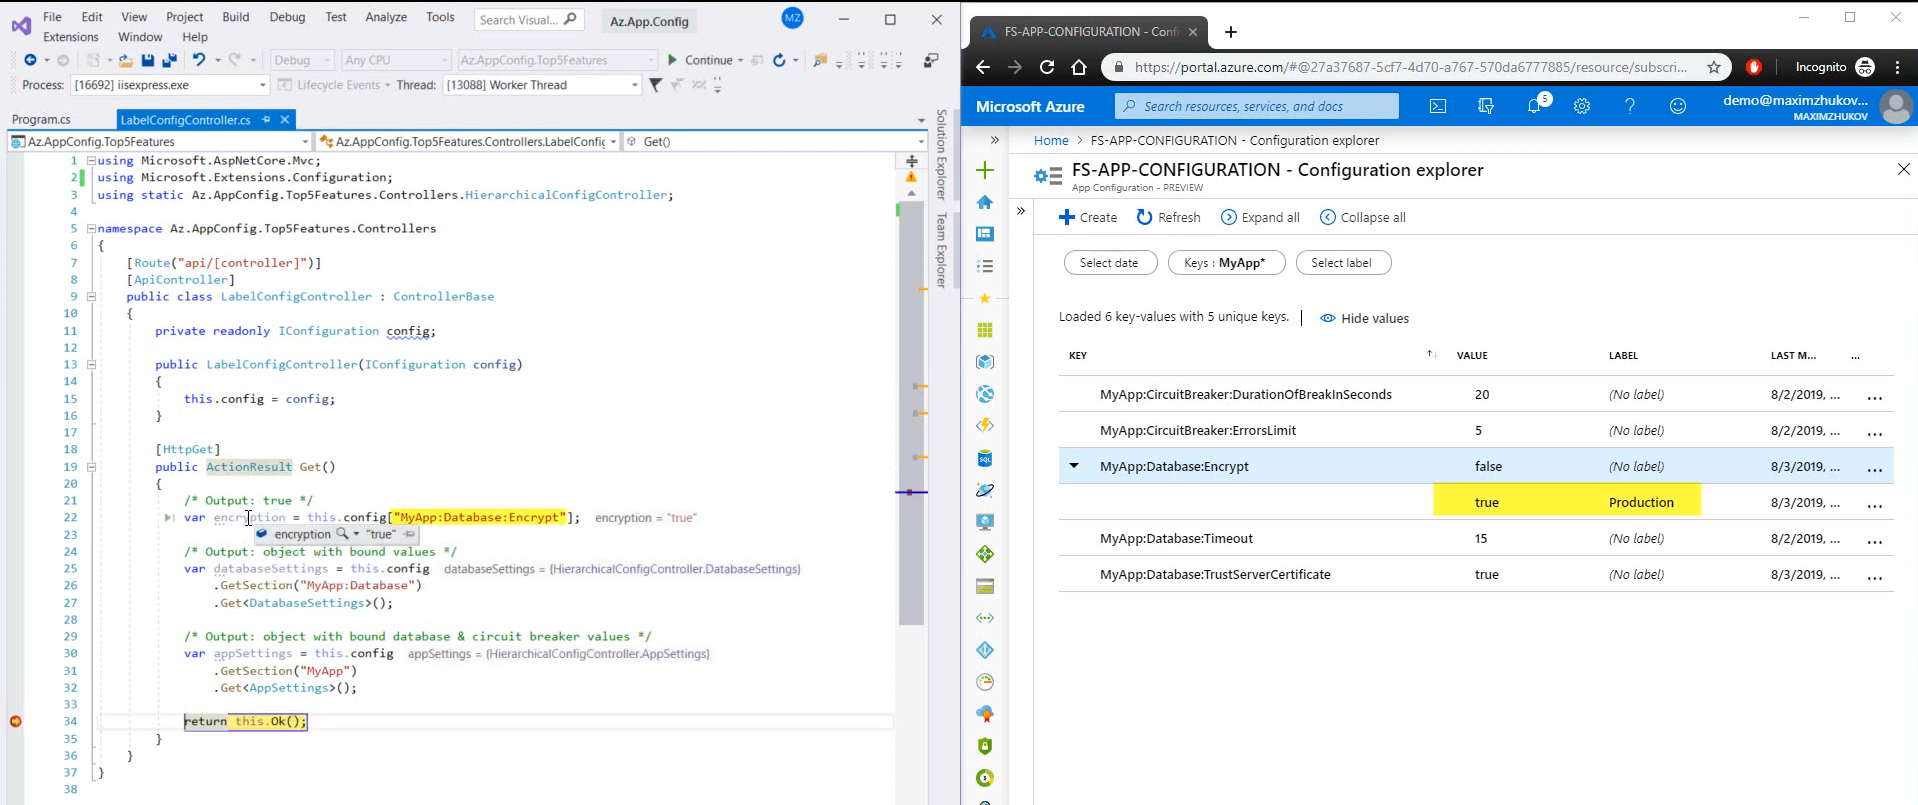
Quote from MSDN:
In your code, you first retrieve the key values without any labels, and then you retrieve the same set of key values a second time with the “Development” label. When you retrieve the values the second time, the previous values of the keys are overwritten. The .NET Core configuration system allows you to “stack” multiple sets of configuration data on top of each other. If a key exists in more than one set, the last set that contains it is used.
Import/export
The feature number 3 is import and export functions. Once you’ve decided to use app configuration with existing applications, you’ll probably need to import application settings. That’s how it works:
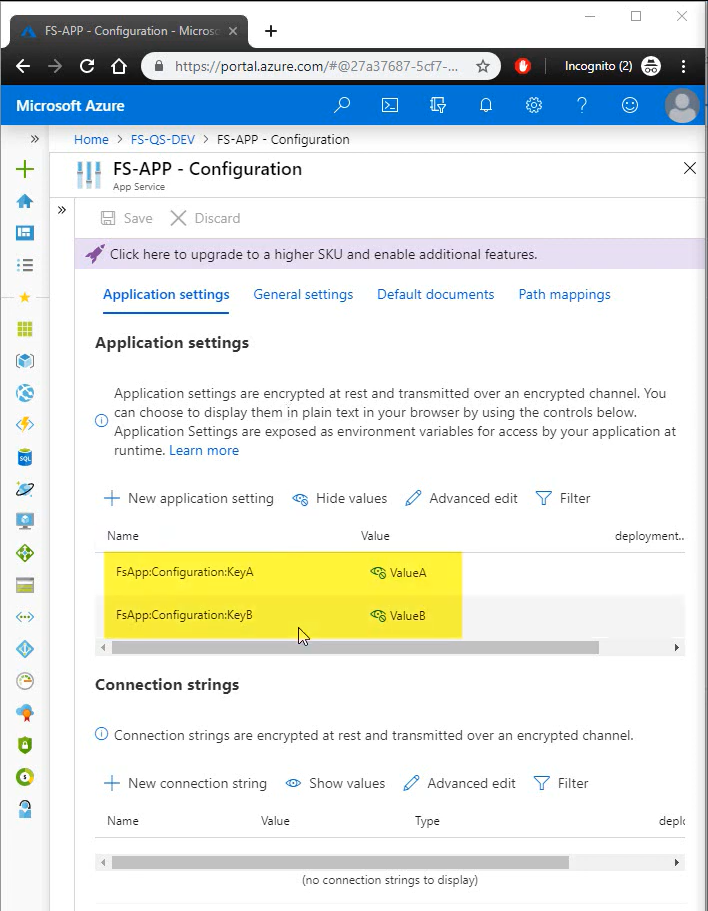
Here we have an app service with two settings, which we’d like to export. So we just:
- Open our app configuration service;
- Click the import/export tab;
- Select app service;
- And click apply.

That’s it- so simple. Besides app services, you can also import data from configuration file or even a different app configuration service. Moreover, it works in the same way for export.
Feature management
So the feature number 2 is feature management.
What if we wanna have ability to enable or disable parts of our application on the fly. In this case, we should just add necessary features at the feature manager tab:
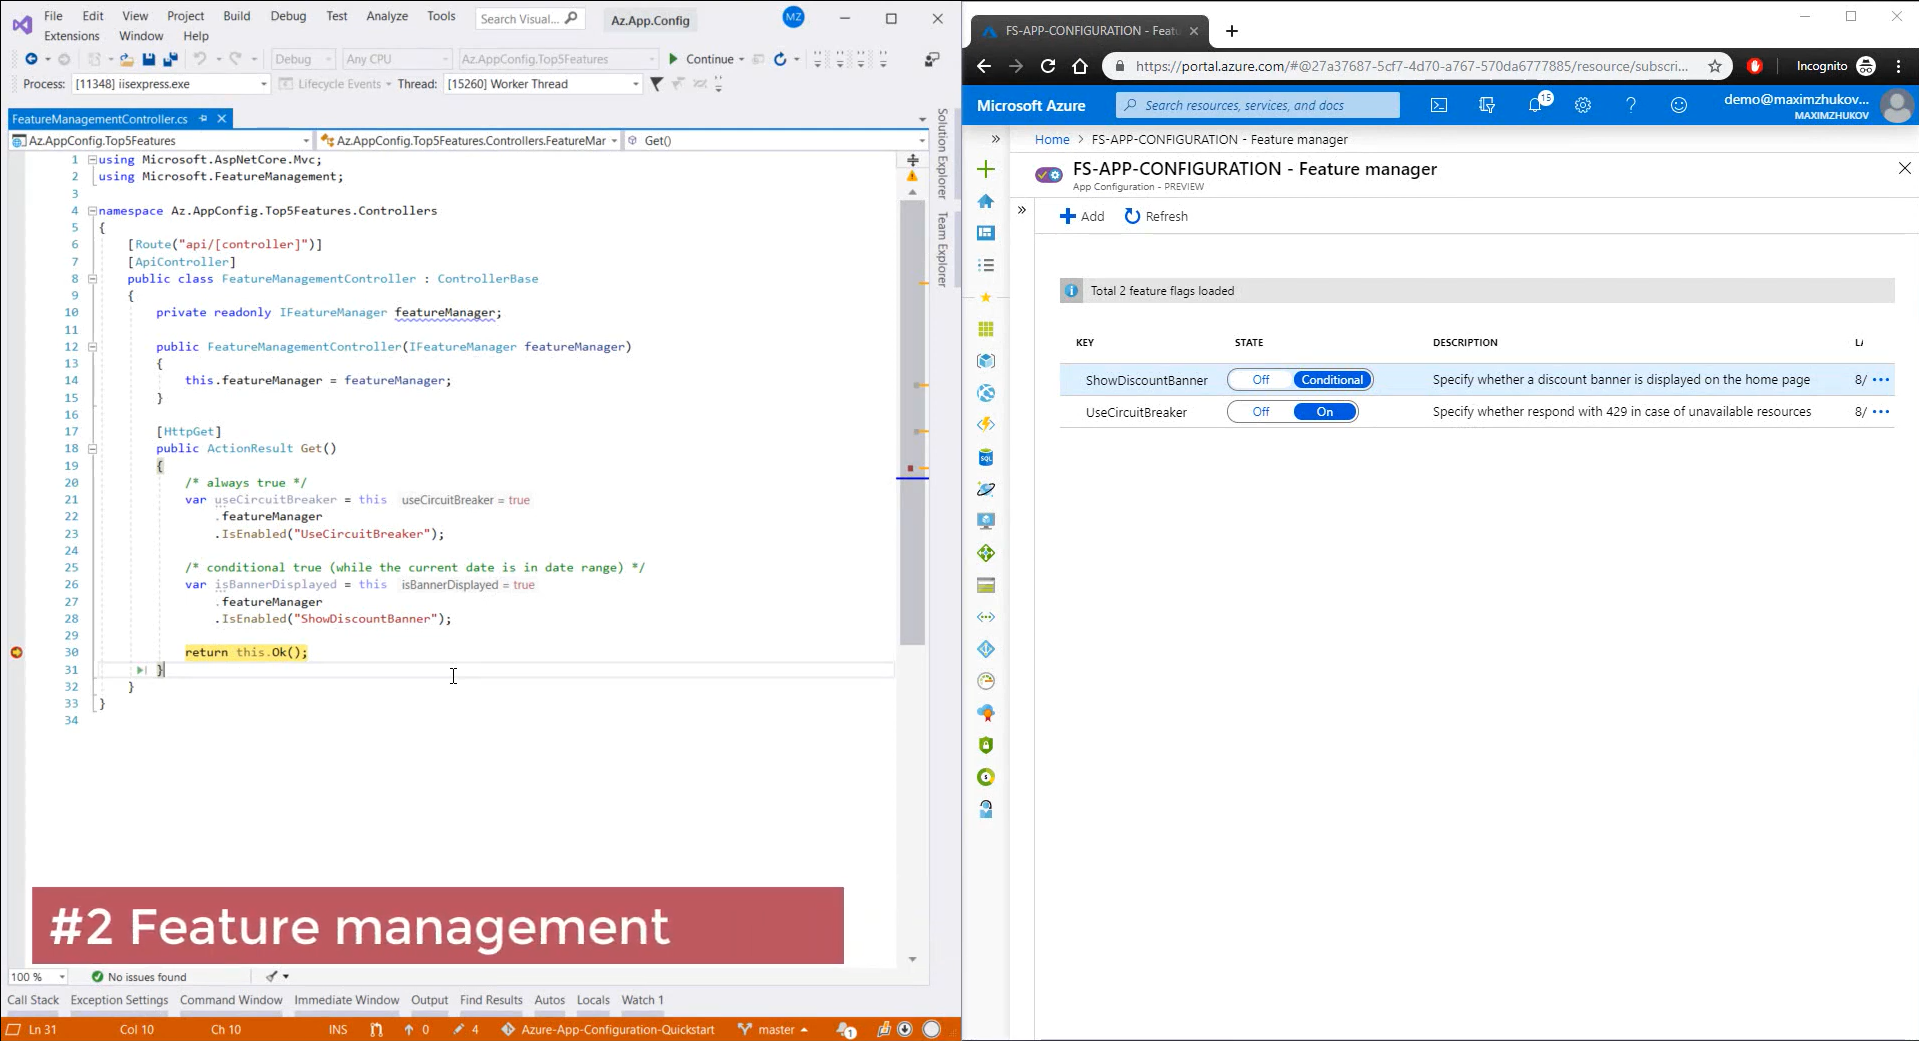
And use them in the code:
private readonly IFeatureManager featureManager;

public FeatureManagementController(IFeatureManager featureManager)
{
    this.featureManager = featureManager;
}

[HttpGet]
public ActionResult Get()
{
    /* always true */
    var useCircuitBreaker = this
        .featureManager
        .IsEnabled("UseCircuitBreaker");

    /* conditional true (while the current date is in date range) */
    var isBannerDisplayed = this
        .featureManager
        .IsEnabled("ShowDiscountBanner");

    return this.Ok();
}
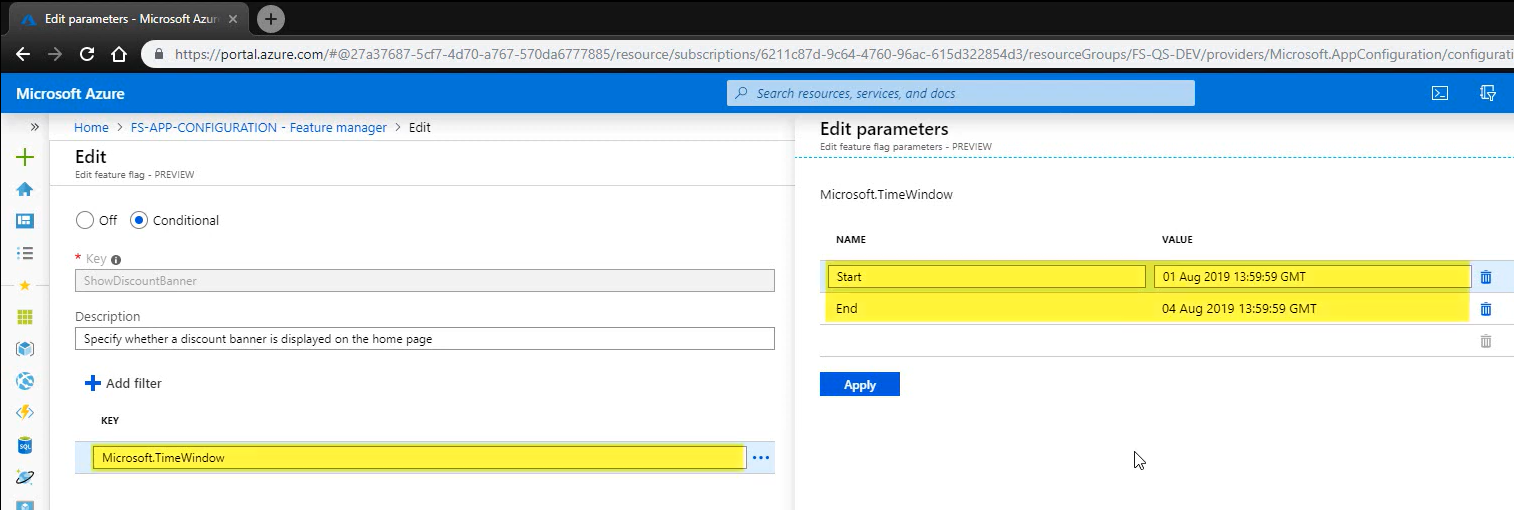
Furthermore, we can even specify a date range when a feature will be enabled. In this case the ShowDiscountBanner value equals to true only from 1 to 4 August:
Events
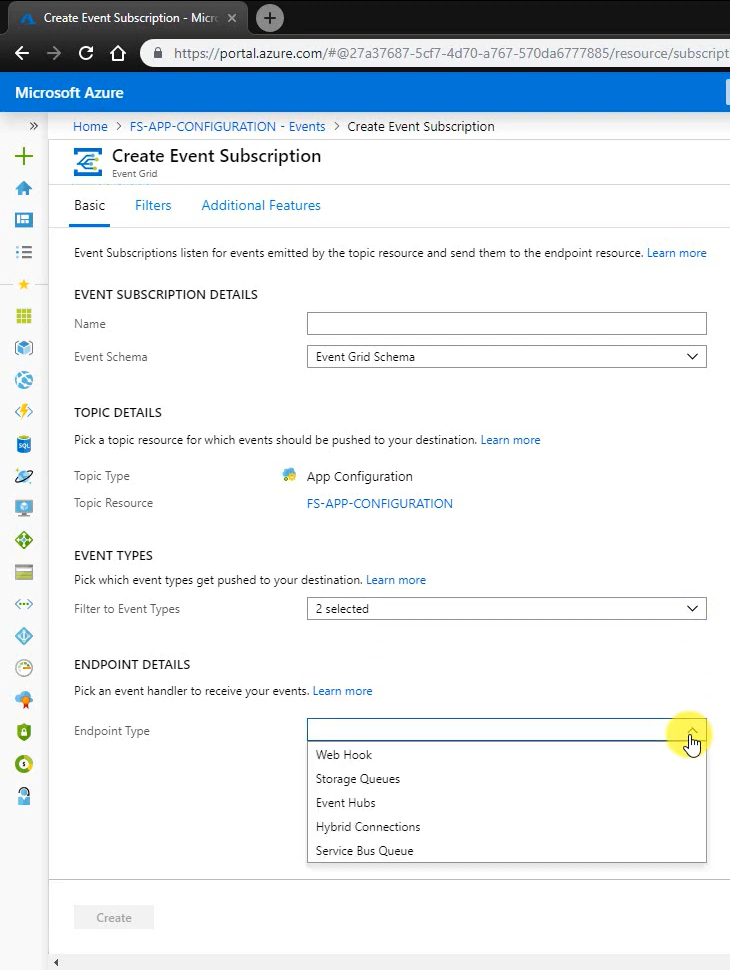
And the latest feature I want you to be aware of for today is event publishing. So if we’d like our applications react to changes key values, the only thing we need to do, is just to create a new event subscription.
So we:
- Open the tab events;
- Click create subscription;
- Type a subscription name;
- Review the event types we’d like to be published;
- And specify the endpoint type (currently, there are available five different channels for communication).
I’m gonna to choose Event Hubs.
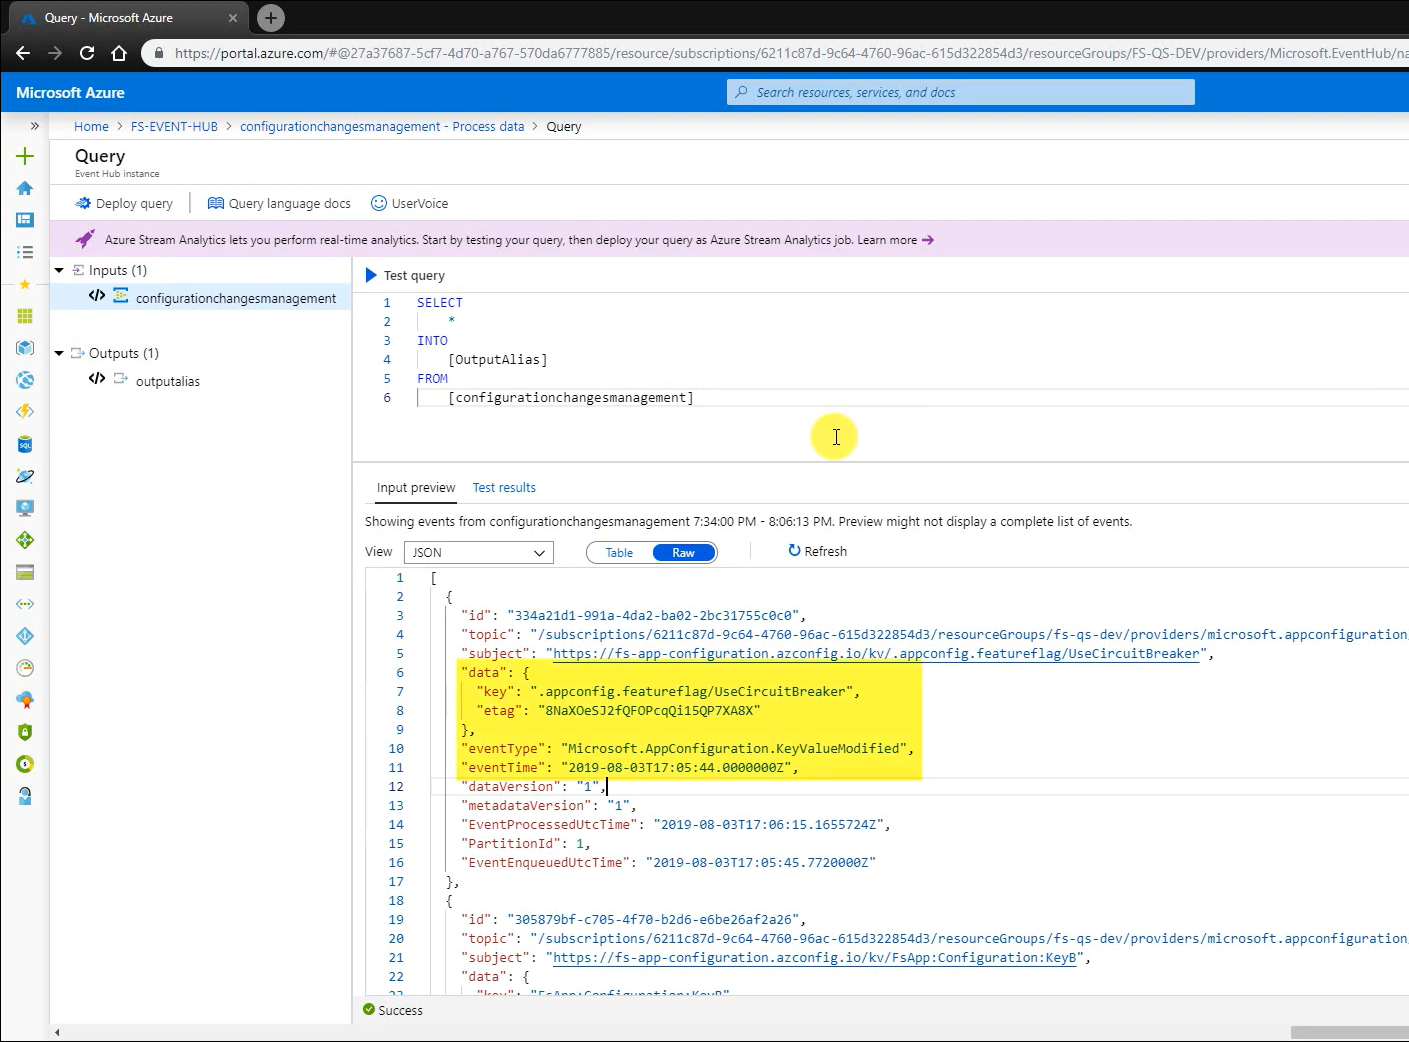
Once the subscription has been created, we can open the Feature manager tab and change the UseCircuitBreaker value to Off. So now, if we open stream analytics, we’ll finally get the expected event:
Quote from MSDN:
Common app configuration event scenarios include refreshing application configuration, triggering deployments, or any configuration-oriented workflow. When changes are infrequent, but your scenario requires immediate responsiveness, event-based architecture can be especially efficient.
Summary
And that’s all I got for today. Thank you so much for reading, welcome to comments, and see you soon!
Reference: